A blown speaker itself is just enough to ruin your whole journey with its annoying, poor sound quality! Probably you're dealing with the same problem, and that's why you're here to get some help, right?
Trust me; you can fix the issues within no time, and that too without taking professional's assistance!
In this article, I'll let you all the nooks and crannies on how to fix a blown car speaker, including the reasons behind a blown car speaker. Although it sounds challenging, you won't have to burn the midnight oil to get this job done!
Note for Featured Snippet: how to fix a blown car speaker:-
- Step-1: Taking Out Your Speaker
- Step-2: Checking for Basic Issues
- Step-3: Replacing Blown Voice Coil
- Step-4: Replacing Diaphragm
- Step-5: Time for a Test!
Contents
What Causes A Blown Car Speaker?
Before you get familiar with the common reasons for a blown car speaker, it's necessary to know the meaning of it. In a nutshell, the definition of a blown speaker is that it's working with deteriorating, worst sound quality or the speaker isn't working at any cost!
So now that you know what a blown speaker is, let's get to know what causes a blown car speaker:
- Turning up the volume extremely loud: This can provide a lot of extra pressure to the speaker and result in the voice coil melting or burning.
- Overpowering: this will cause its essential parts to tear, break, or become way too loose!
- Physical Damages: It may occur if you've installed your car speaker with less care.
Related: car audio setup for sound quality
How to Fix a Blown Car Speaker – Step By Step Guide:
Let's get to know the proper way of fixing a blown car speaker following the five effective steps:
Step-1: Taking Out Your Speaker
When you notice your speaker requires replacement, your first step will be to remove it from your car. And these are what you need to perform to get the job done:
- Ensure to find out the battery's negative terminal to disconnect it. By doing so, you can minimize the risk of ending up with short-circuit issues.
- After that, you can disconnect the cables of your speaker straight away by taking off the existing screws, keeping it in place, and then removing the speaker.
Step-2: Checking for Basic Issues
You may notice the voice coil has slightly moved away from its exact location, and you should consider it a fundamental problem since you'll be able to fix it within a snap! Give the points a look to get rid of a blown voice coil:
- Pressing on your speaker cone as gently as possible is what you'll do to find out if it's usually moving or not. If not, feel free to get a flashlight to look underneath it.
- Confirm that the connection of the voice coil is in better shape. The speaker cone should be pushed a little upward. In case you find yourself capable of moving the diaphragm and cone without damaging them, then congrats, as you'll fix the problem!
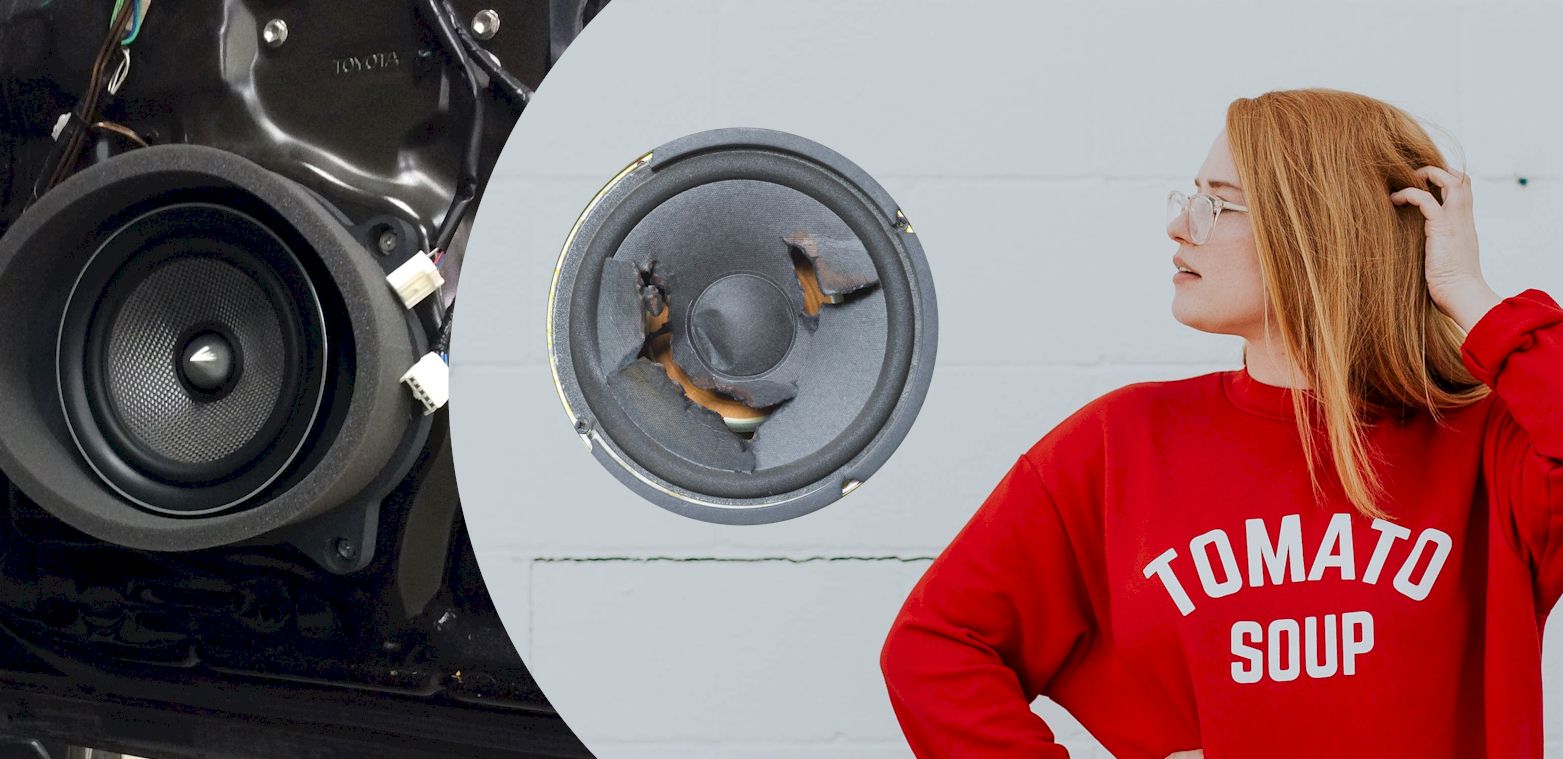
Sometimes, your speaker might not function appropriately, especially when you find the diaphragm has torn. If it happens, these are what you need to do:
- Get a single piece of paper towel and try to break it to end up with a single ply.
- Cut it up thoroughly according to the size of that diaphragm.
- Make sure you're applying a versatile adhesive to that ply of paper, utilizing it to tie every single part together of that diaphragm, and that's it!
Step-3: Replacing Blown Voice Coil
Poor cone vibration, incorrect frequency response, ratting, and noises; are some of the common blown voice coil symptoms. If you notice any of them, keep in mind that the voice coil is damaged, and replacing it has become necessary!
Although replacing it isn't rocket science, it may take more time to get the job done. And here's how to perform this task:
- Get a piece of a sharp knife to cut up the speaker's gasket and reach the coil under the diaphragm.
- Removing the old piece of the coil and disengaging it from those connections should be your next task to perform.
- Carefully set up the new coil and solder it to those wire connectors. You can take an expert's help if you find this task a little challenging.
- A piece of glue comes in handy when it comes to joining the diaphragm back.
Related: best 4×6 speakers for your car
Step-4: Replacing Diaphragm
When it comes to replacing the diaphragm, you can follow the previously mentioned steps. Nevertheless, it's crucial to look for several things while replacing. By doing so, you can reduce the risk of damaging the coil. So let's see how to replace it:
- Ensure to join the diaphragm back with adequate amounts of care, and confirm that you've successfully attached it.
- It's so important to use the diaphragm that matches the size of your speaker perfectly. If not, then you won't get the result you're looking for!
Important Note:
If you're still unable to fix the issues, replacing the speaker should be your last and ultimate task! But no worries, you can quickly get them from your nearest parts store or online!
Step-5: Time for a Test!
Do you want to know how to test a speaker to see if it is blown or not? No worries, it's a snap! All you need to do is play your favorite song or any music at a low volume. Afterward, increase the rate of volume gradually to find out the changes.
Pat yourself on your back if you find no changes. It's a clear sign that you've successfully fixed the blown car speaker issues!
Note: Give this video a look if you want to get practical knowledge on fixing a blown car speaker!
Related: How to connect car stereo wires
Frequently Asked Questions:
Can speakers damage the amplifier?
Yes. When the range of your speaker's impedance appears to be less than the range of the amplifier's impedance, the speaker draws more energy than the amplifier can offer. And this will result in the amplifier damaging or overheating issues.
What does a blown speaker sound like?
In the fewest possible words, you'll end up with distorted sound from blown speakers, which isn't that clear. Anyone can notice that type of sound while playing any music with loud bass.
How to tell if a speaker is blown?
Feel free to perform these three basic tasks to diagnose blown speakers:
- Playing a piece of music with heavy bass to notice any distortion.
- I am using equalizers to move every parameter to the center and try to increase the range of volume.
- You are moving the output of sound to your speakers using your vehicle's fader and balance.
Wrapping Things Up!
I think you've earned plenty of knowledge regarding how to fix a blown car speaker. Make sure to follow all the above-written steps I've incorporated here, which will definitely help you fix those issues once and for all!
But if you fail to fix your car's speaker, probably it's time to get something new.

HI, John Andrew here. I’ve been an audiophile since I was a little kid. I’m an original member of myaudiolover . It emerged as a way for me to share my passion and knowledge for audio technology. If you’re looking for tips, techniques, and insights about audio-tech, that can enable your productions that professional edge, then MyAudioLover is the place for you!