Are you having trouble connecting your microphone to your PC? There can be various reasons for that. One particular issue you may have is that the microphone array not working. This is a critical problem to tackle, especially if you are running Windows 10.
But don’t you worry now, as we have got some fixes for you. We have given some solutions step by step below that should work unless your hardware is damaged. Without further delay, let’s get right into it.
Contents
How to fix windows 10 Microphone array not working
There are several solutions you can try out to this problem. It has different scenarios and messages as well. The issue can be with the integrated microphone array or anything you add externally. Sometimes you won’t even get any errors yet face this issue.
The common reasons for this problem are faulty drivers, outdated drivers, device incompatibility with windows version, etc. This issue can also cause by faulty hardware or issues with your audio ports. Before you move onto these methods, always make sure to check up on the connection and ports.
Also, before jumping into the methods, try to troubleshoot the problems first. This will tell you if there are issues with the hardware or software. At times, just troubleshooting can give you the solution to your problems if you don't know why.
To troubleshoot the problems, you can type “Troubleshooting” on the search bar in the taskbar. Or you can go into the control panel; there, you will see the option hardware and sound. Under that, you will find troubleshoot audio playback. Click on that and troubleshoot.
If this doesn’t work, then you can try the following manual methods. Go for these if you know what’s the reason for the issue to occur.
Method-1: Rolling back/updating drivers.
Follow this method if you have a faulty driver issue. This can happen after updating to new drivers. So, all you have to do is roll back to the previous version of your audio drivers. Here’s how you do it.
- First of all, you have to open up your device manager. To do that, you can type device manager on the search bar. On the screen, you will see all the devices connected to your PC. There is an option that says audio inputs and outputs. Click on it to find your microphone device.
- After that, right-click on the microphone you are having issues with and click on properties. This will pop up a new window.
- In that window, go to the Driver tab. There you will find an option that says roll back driver. Click on that.
- This should roll back to the previous version of the microphone driver you had.
- Finally, restart your computer. And if there were issues with the new driver update, your problem should be fixed.
You can follow all these for outdated drivers as well. In that case, instead of choosing roll-back drivers, you have to choose update drivers. Or you can download the drivers manually too.
Method-2: Setting microphone device as default
Sometimes you will see Realtek not picking up the mic; the reason could be that your microphone is not set to default. In that case, you have to set your microphone to default. Here’s how you do it.
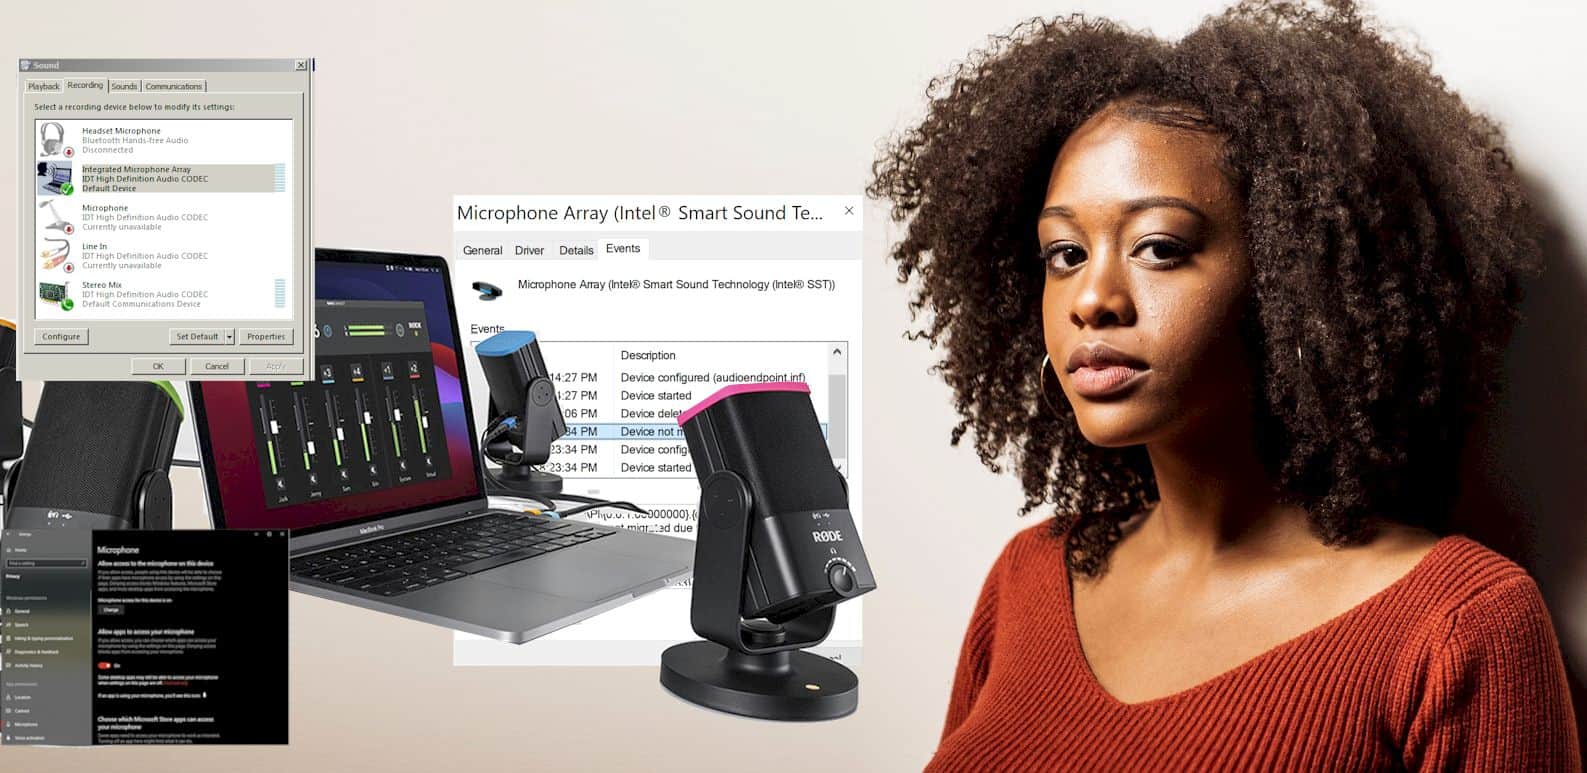
- Open up your sound options from the control panel. Please don’t do it from the search bar, as it will bring up a different sound setting.
- Once you open the sound setting, go to the recording tab. Here, you have to right-click and select the option to show disabled devices.
- Then, you will see all the devices connected to your PC. Right-click on your microphone input and enable it.
- To set the microphone to default, you have to click it and press on set to default at the bottom. And that’s it.
If you don’t see your microphone even in the disabled devices section, there must be some issues with the connection. Either your ports are damaged, or your microphone has issues.
Method-3: Solving compatibility issues
Often you will see your devices stop working after a windows update. Or, if you have upgraded your windows to a newer version, you may face this issue. To solve that problem, you can run drivers for your microphone in compatibility mode. Here’s how to do it-
- First of all, download the drivers from the official manufacturing website. You can find drivers if you have a branded microphone.
- Now, right-click on the setup file for the driver, then click on properties.
- Then, go to the compatibility tab. There you will see an option that says compatibility mode. Tick the checkbox there and choose the previous version of your windows. Click apply.
- After that, install the driver in compatibility mode. When the installation is complete, restart your PC, it should solve the compatibility issues right away.
Method-4: Reinstalling your audio drivers
You already know about Realtek audio drivers. Installing the correct version of the Realtek audio driver can also fix this issue. To do that, you have to uninstall the existing Realtek driver from your pc.
- You can find the Realtek audio driver from your Motherboard driver support website. Or you can download it from anywhere on the internet.
- After downloading it, install the drivers as they are. Once it’s installed, you have to restart your PC.
- That should fix any audio problems you might have been having with your pc.
Don’t opt for this method if all the other audio options are working properly for you. However, if you have tried everything else above, then this one is worth giving a shot.
Related: how to set up a USB headset Windows 10
Final words
To sum up, there are various solutions to this problem, like there are various reasons. If it's related to the drivers, then updating or rolling back or reinstalling the drivers should fix the microphone array not working.
However, if none of the methods we discussed work, then you might have to go for new windows or maybe a new microphone. There is nothing you can do to avoid that.

Graduated with a Bachelor of Audio Engineering and Sound Production. He has worked with a number of studios as a Recording Engineer, with over 10 years of servicing experience in both re-recording mixing and sound editing.